Showing posts with label Craft Room. Show all posts

Thursday, July 28, 2011

Simple and Inexpensive DIY Art

I mentioned in my last post that I would tell you how I did my DIY art for the craft room, and here it is! I made the pictures of the iconic chairs using magazines. I got the idea from my friend, Andrea, over at Strawberry Chic.
First, I went through my old magazines and cut out different pages with similar colors.


Then, I printed out two copies of a picture of the chair in black and white.


One of the copies I cut apart. I cut out the different pieces of the chair by it's lightness and darkness.


Then, I took those pieces and found similar shades of color and traced the shape onto the magazine page and cut it out.


I used the other black and white print out to lay the pieces on so I didn't get the different pieces mixed up as I went. I just kept cutting out all the pieces until I had the whole chair, and then I glued it all on a piece of cardstock. I had some old frames I wasn't using, so I painted them white, cut out some mats from some left over mat board I had, and that was it! This project didn't cost me a dime!


I loved the way they turned out. They're a little abstract and artsy, and it was super fun to do!
I did something similar to this in my baby girl's room, except I used scrapbook paper.


Super inexpensive and cute! This little collage cost less than $20. The frames I found on sale at Michael's for $3 each, and the paper cost me $5. I love it when I can do stuff for that cheap!


Tuesday, July 26, 2011

The Craft Room

I finally am posting pictures of the craft room! Most of the room has been done for a month or so now. I was just adding the finishing touches and making sure it looked perfect. So here it is...


The shelves are just some boards purchased at Home Depot that I stained. Calvin hung them with inexpensive metal brackets. The total cost for the shelving was less than $35. The boxes are from Ikea and hold all of my stuff perfectly.


I went with the green for the dresser. I love it! I had some old knobs from my bedroom dresser that I painted white, so I didn't have to puchase any. Always love it when that happens!


My DIY art. I will explain how I did it in a later post.


I love the way it turned out! I'm not a huge crafter, so it's the perfect size. I love knowing where everything is now and having a place where I can leave my sewing machine out. Also, I would like to give a big shout out to my wonderful and very talented husband who made it all happen. Love you!

Thursday, June 2, 2011

The Desk

Calvin built the desk in the craft room last weekend. It looks amazing! I love it. I can't wait to use it.


Don't I have an awesome husband?!!

Friday, May 13, 2011

Craft Room Progress

Here is an update on the craft room. Calvin laid the wood floors, but we wanted to wait to stain them until we got some nice weather so we could open the windows for ventilation. Well, Idaho weather has been SUPER crappy, so Calvin was just able to do the staining last week. Here is what it looks like now:


We still need to polyurethane the floors, and then add some trim. I patched and painted the walls. It is coming together and I am getting really excited for it! So... I am an interior designer which means I had to put together an inspiration board and some plans of what I dream the room to look like.


A. Wall color - Glidden "China Rain." Same color that's in my bedroom. I had some extra, so that was the deciding factor. The rest of the color palette is blues and greens.
B. Lighting - The lighting in the room is awful, so I plan to find a cute lamp to put on the desk for some task lighting. This lamp is amazing! I just found in on some random website. I will see if I can find something similar.
C. Cork Board - This is an actual picture of the one I have already made for the room. The frame is from my work. A loooooong time ago my boss gave it to me because the mirror inside it was shattered to pieces, so I bought some cork board and glued a piece of fabric on it. A beautiful yet functional art piece.
D. Chair - So, this is a Louis Ghost Chair and sadly it won't be going in the room. It is a VERY big dream of mine to own one of these, but I just don't have $400 to buy one right now, or even $140 to buy a knockoff. Some day I will own one. Wouldn't it look so amazing in my craft room though?!! I do need a chair, so I will probably just find a cute old wooden one that I can paint.
E. Wall Art - I saw this online in a craft room. So cute!
F. Storage - Super cheap and colorful boxes from Ikea. I actually have these already. I got them two weekends ago when I was in Utah visiting my two favorite interior design friends.
G. Dresser - I plan to find a cheap dresser on Craigslist that I can paint really fun, like this one. I will use it to store my fabrics and other items.

And here is a floor plan of how is is all going to be laid out:


And here is an elevation of the shelving, so you can see what I am thinking.


Anyways, you probably think I am crazy but I like doing stuff like this. It is like I am in school again, which I miss. I can't wait for it all to come together. Hopefully it won't be much longer. :)

Saturday, February 12, 2011

Another Weekend Project....yeah right.

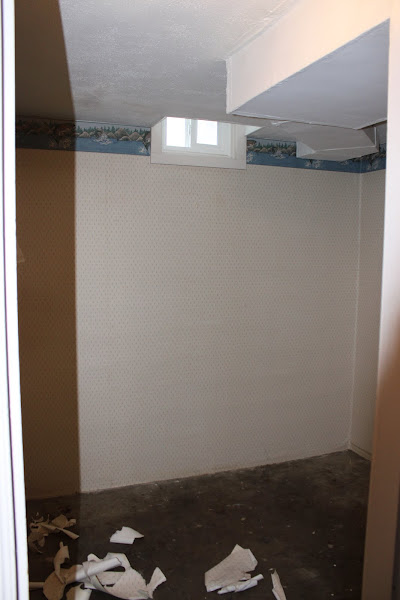
We started another project where I thought, "This will be simple. Throw up some paint. Calvin will build a quick desk. Easy, right?" Well, it's now almost three in the afternoon and the room is at a standstill looking like this...


You would think I would learn my lesson. (I apologize for the shadowy pictures. The lighting is horrible.)
For my Christmas present I decided I wanted to fix up the tiny room in our basement as a craft room. A place where I can do my sewing and have all my fabric and craft supplies organized. The room was beginning to be a disaster. With no real place to put everything, it was all ending up in piles on the floor. So far today, after taking everything out, we realized how bad the walls are. They aren't plaster or drywall. They are horizontal wood slats that are all warped and covered with nails. So, instead of just painting them, like I originally thought, we need to put some mud/texture on them. The carpet smelled like cat pee from the previous owners, so we decied to take that out too. I am excited for it to be done, and even though I always complain about these projects you know I still LOVE them. It's an addiction. :)